
I’m exploring some of the less common options with the Silhouette Cameo. My second hand machine came with a rotary cutter blade, so attempting to cut fabric was a natural step.
I had mixed results for my first attempt.I attempted to cut the strips for bias binding with the Cameo.

The software design was fairly easy. The red lines above are cutting lines, the blue lines are to measure the 2″ gap between each line.
I used a 12″ x 12″ mat that came with my machine. It has lost a lot of its stickiness, so the fabric bunched up when it was cutting, and didn’t cut through all the lines.
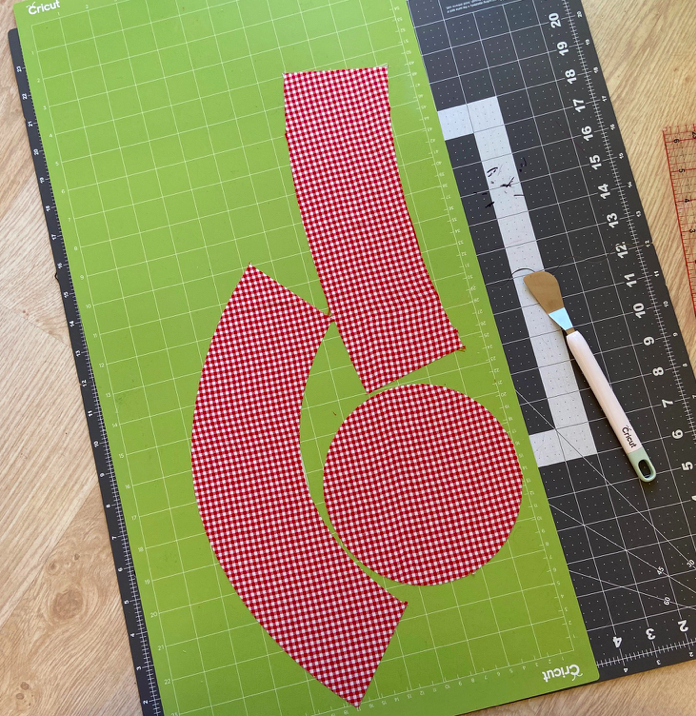
For my second attempt, I had a new mat (12″ x 24″, bought a Cricut mat as they were on sale) and I also applied some basting spray to the mat. I used the default rotary cutter settings (increasing the speed to 2 once the first one had cut successfully). This time the lines cut beautifully. For applying the fabric I found the best method was to slowly unroll it onto the sticky surface, smoothing as you go.
The most time-consuming bit was the software manipulation of the PDF to transform the drawn lines to cutting lines. For those interested, I’ve put a list of steps involved.
- Open the PDF file in Silhouette Studio software (n.b. you’ll need to upgrade to Designer Edition in order to use PDFs, but I think it’s worth it). Import it as a vector.

- Select the size you want and drag it off your work area. Then select everything else that remains, and delete it. Ungroup the lines that you’ve kept.

- Ungroup the lines you’ve kept. click on the circle and drag it back to the work area. This will leave behind notches and text etc. Delete the stuff that is left over.

- With the circle still selected, change the line style to dashed, then change it back to solid. Now it will cut as a solid line. I also added a fill to make it easier to see. (this won’t affect the cutting).

- You need to repeat these steps for each page of the PDF. So the A0/ copy shop option is easier if you have it. This pattern was four single pages, so once I’d prepped all the pieces, I cut and paste them onto the one file. Then you can also move shapes that are split across two pages onto one page and use the weld option to join them together.
My verdict: it’s hard to tell if this is more efficient than printing the pattern, cutting it out then cutting out the fabric. I’ll need to practice and streamline the software prep before I can judge. It’s also worth noting that you need to put 4 pieces of fabric through for this toddler’s bucket hat, as the mat isn’t big enough for all the pieces to fit on at once.

For larger patterns, I’m also keen to try cutting out pattern pieces (in paper) – it would save all the printing, taping and cutting that is part of PDF patterns. I’ll report back when I’ve tried it!


